


We are Closed from Tuesday 16th December 2025 Re-Open on Tuesday 27th January 2026 The joy of #Christmas, is spending time with

General Business Hours for Clients at Sew n Design Client Hours Tuesday – 1 pm close 6 pm Wednesday – 1 pm
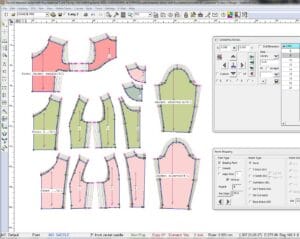
The process for digitising, grading or printing patterns at Sew n Design